Preparation
- Firmware: INAV Firmware (≥1.7.3)
- Configurator software:INAV - Configurator
- Any available UART interface on the INAV
- Connect the RunCam Split with the UART interface of the Flight Controller
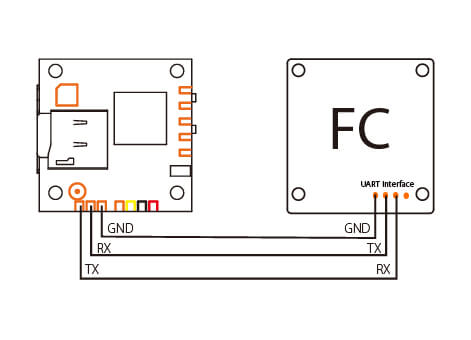
2.Make the Flight Controller recognize the Split
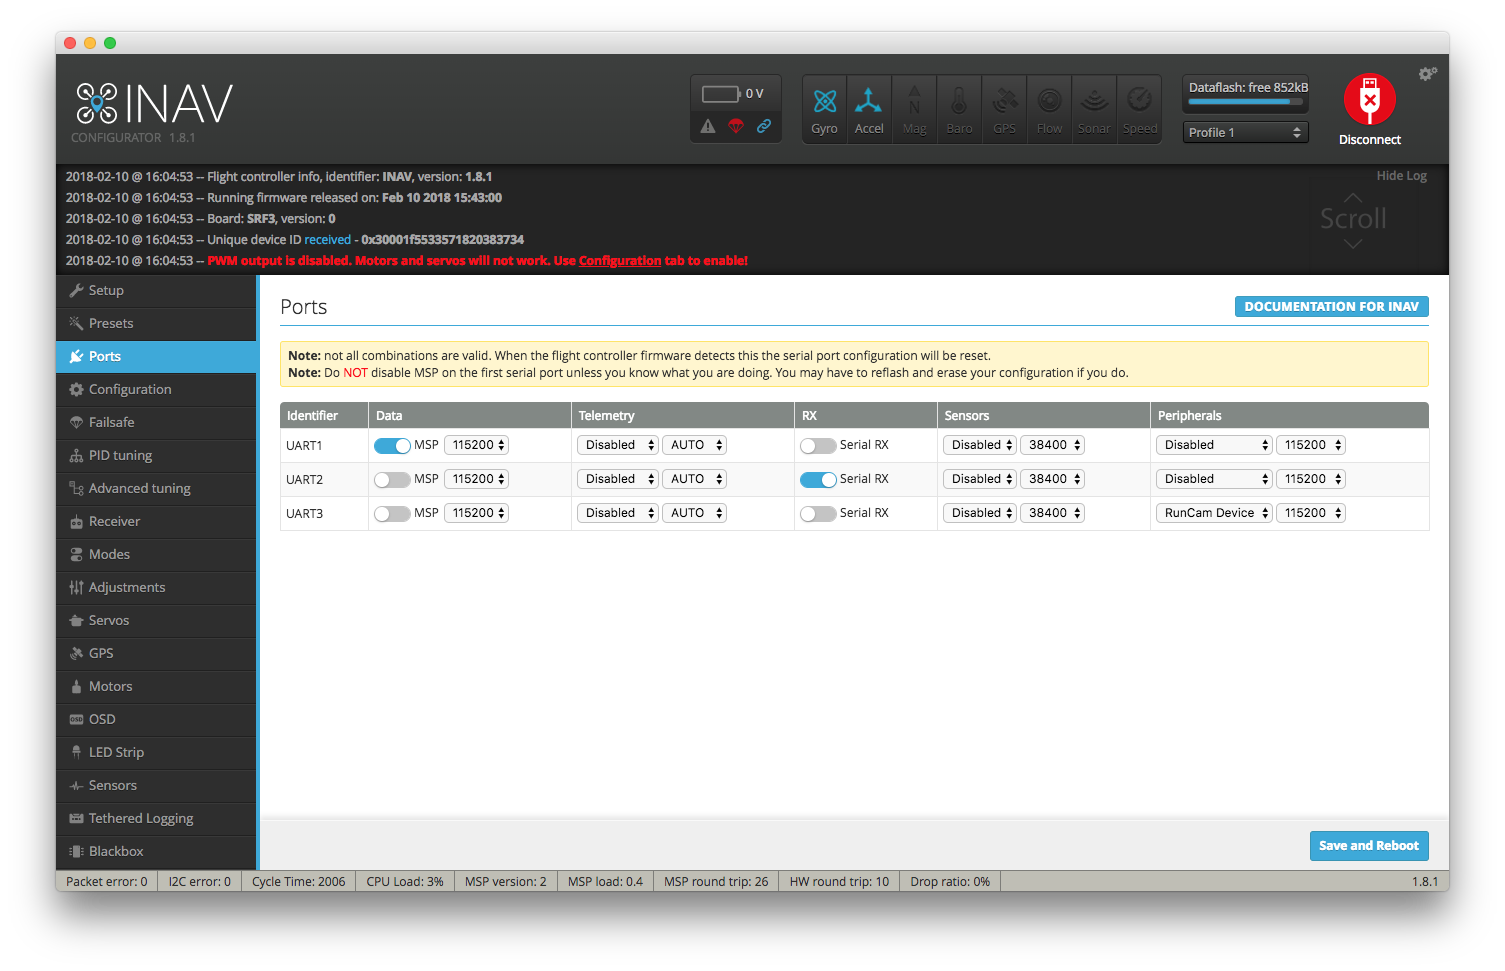
For example, we connect the Split to the UART 3 interface on the INAV: connect the flight controller to the computer, then open the INAV Configurator.
In the Peripherals column of the line UART3 (on the Ports tab), select RunCam Device and click Save And Reboot.
3.Instructions of the functions of the camera and assigning transmitter channels to them
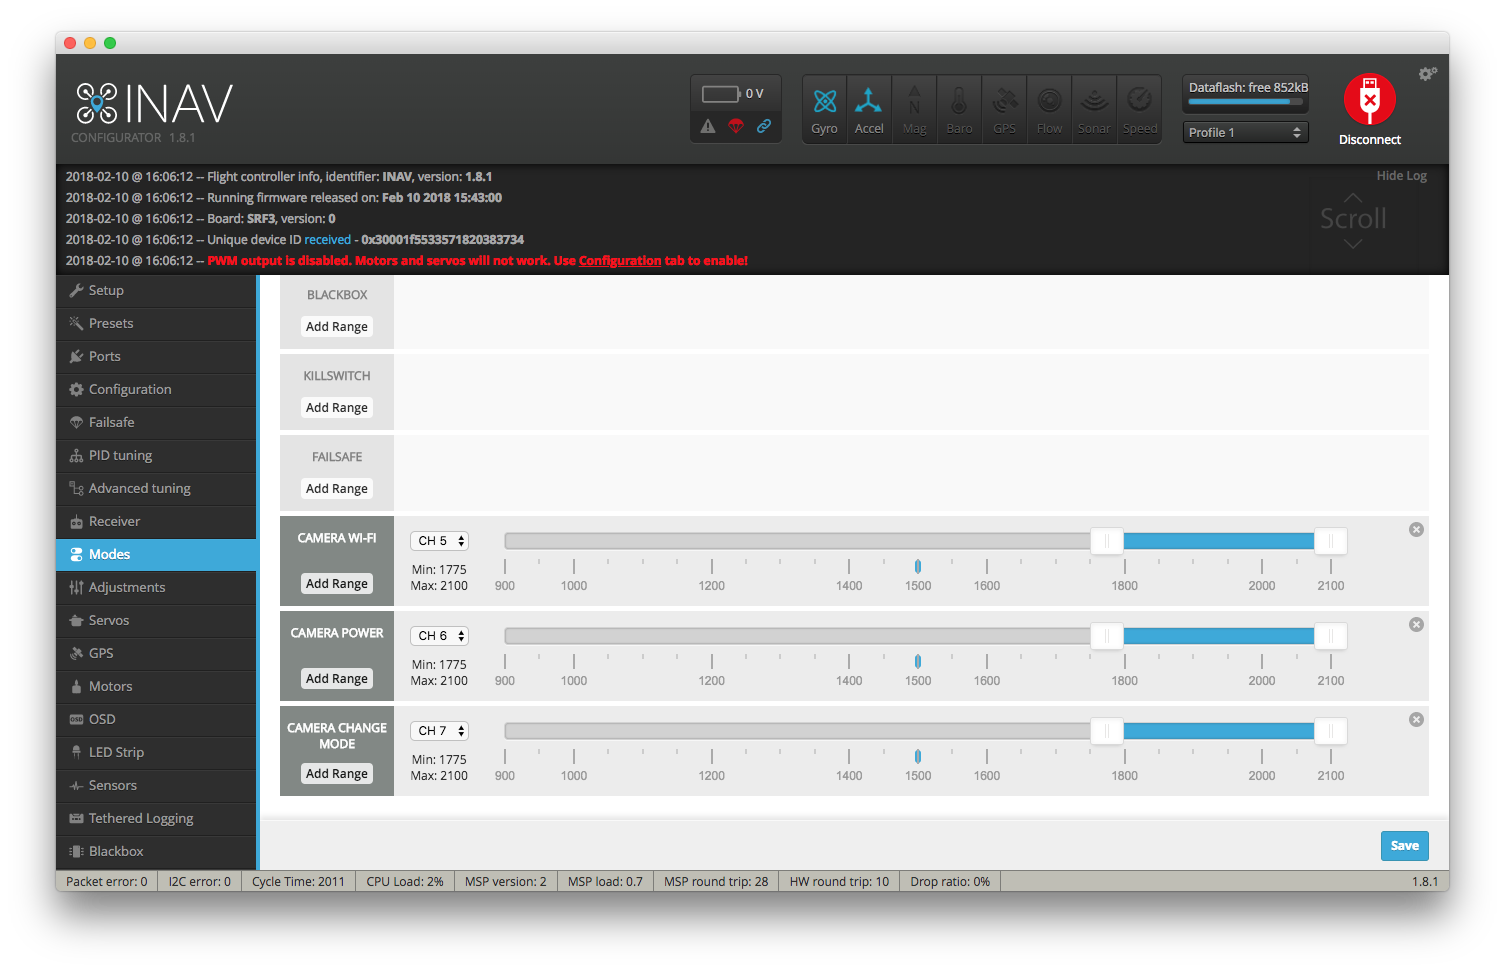
In the INAV Configurator, navigate to the Modes tab. There are new CAMERA WI-FI, CAMERA POWER and CAMERA CHANGE modes.
- CAMERA WI-FI: turn on/off the WIFI of the camera. When in the OSD of the camera, this is used to confirm your selection.
- CAMERA POWER: start/stop the video. When in the OSD of the camera, this is used to move to the next menu item.
- CAMERA CHANGE MODE: switch among the three modes, video, photo and OSD setting mode. When in the OSD of the camera, this will exit the menu.
Assign any available channel to the function you need, for example:
- Assign the AUX1 to the CAMERA WI-FI, range 1775-2100
- Assign the AUX2 to the CAMERA POWER, range 1775-2100
- Assign the AUX3 to the CAMERA CHANGE MODE, range 1775-2100
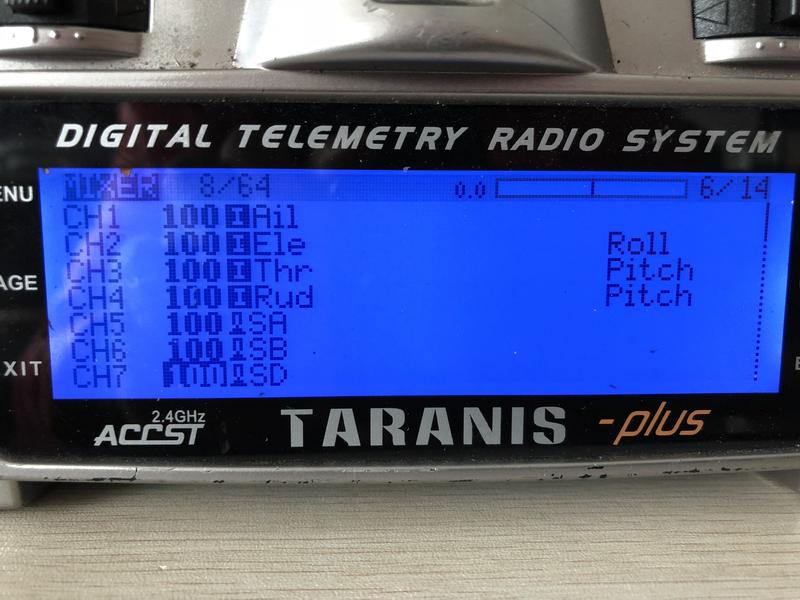
4.Assign the channel to the switch of the controller
Please choose your Model on the controller, then access to the Mixer interface and assign the channel to the switch of the controller. Take opentx 2.2.0 for example, assign the channels CH5, CH6, and CH7 to SA, SB, SD respectively.
Comments